Set Up Your Base Station
A step-by-step guide

Here's What You'll Need

Dragonfruit base Station and Power Cord (not included)
Please note: Hardware is procured separately, and our team provides clear guidance based on your deployment
Ethernet Cable (s) (Not Included)

USB-C Ethernet Dongle (Not Included)
NOTE: Required for dual-network (dual-homed) setups, Dongles are not provided with the Base Station shipment and must be procured by the customerLet's Dive In
This installation guide is intended for on-premise installers. It will assist you in smoothly setting up your Base Station - an appliance powered by an Apple Mac Mini or Mac Studio. It will take ~30- 40 minutes (actual time may vary depending on network speed). Feel free to contact us at [email protected] if you encounter any difficulties.
Setup Overview
Unpack the Base Station
Connect the base station to your network
Switch on the power switch on the Base Station
Allow the base station to auto-configure

1 (a) Unpacking the Base Station
Carefully unpack the Mac mini from its shipping box. Simply pull the paper mailing tab to protect the box for future use and delicately remove the shrink wrap.
Remove the protective shipping cover, black plastic port protector, and retrieve the power cable from the bottom of the box.
Store the Mac mini box and shipping box for potential future needs, such as warranty claims or return mailings.
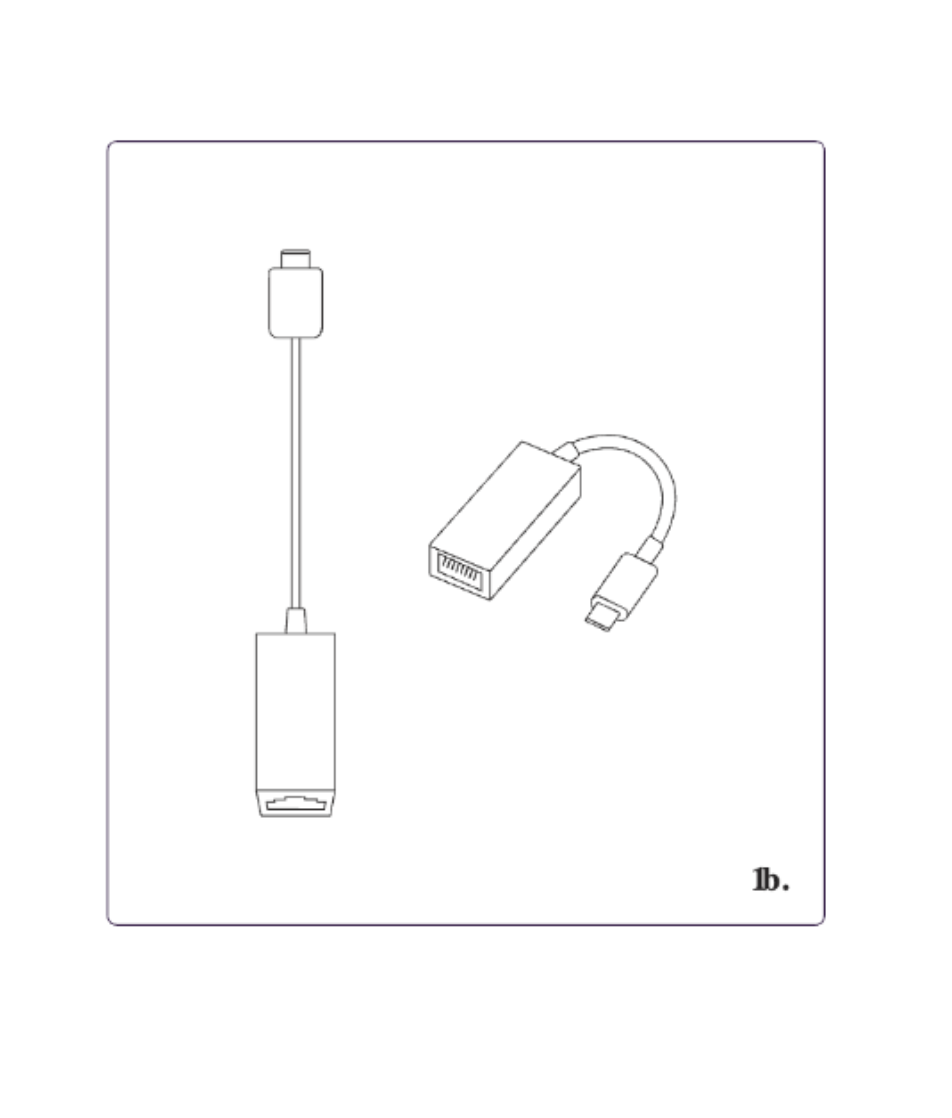
1 (b) Preparing the USB-C Ethernet Dongle
Shown is a sample USB-C to Ethernet adapter (aka dongle). If you are setting up a dual-homed configuration (separate camera and Internet networks), you will need a USB-C Ethernet dongle. If applicable, unpack it now.
Reminder: Dongles are not included in shipments and must be procured by the customer.
2. Network Connection
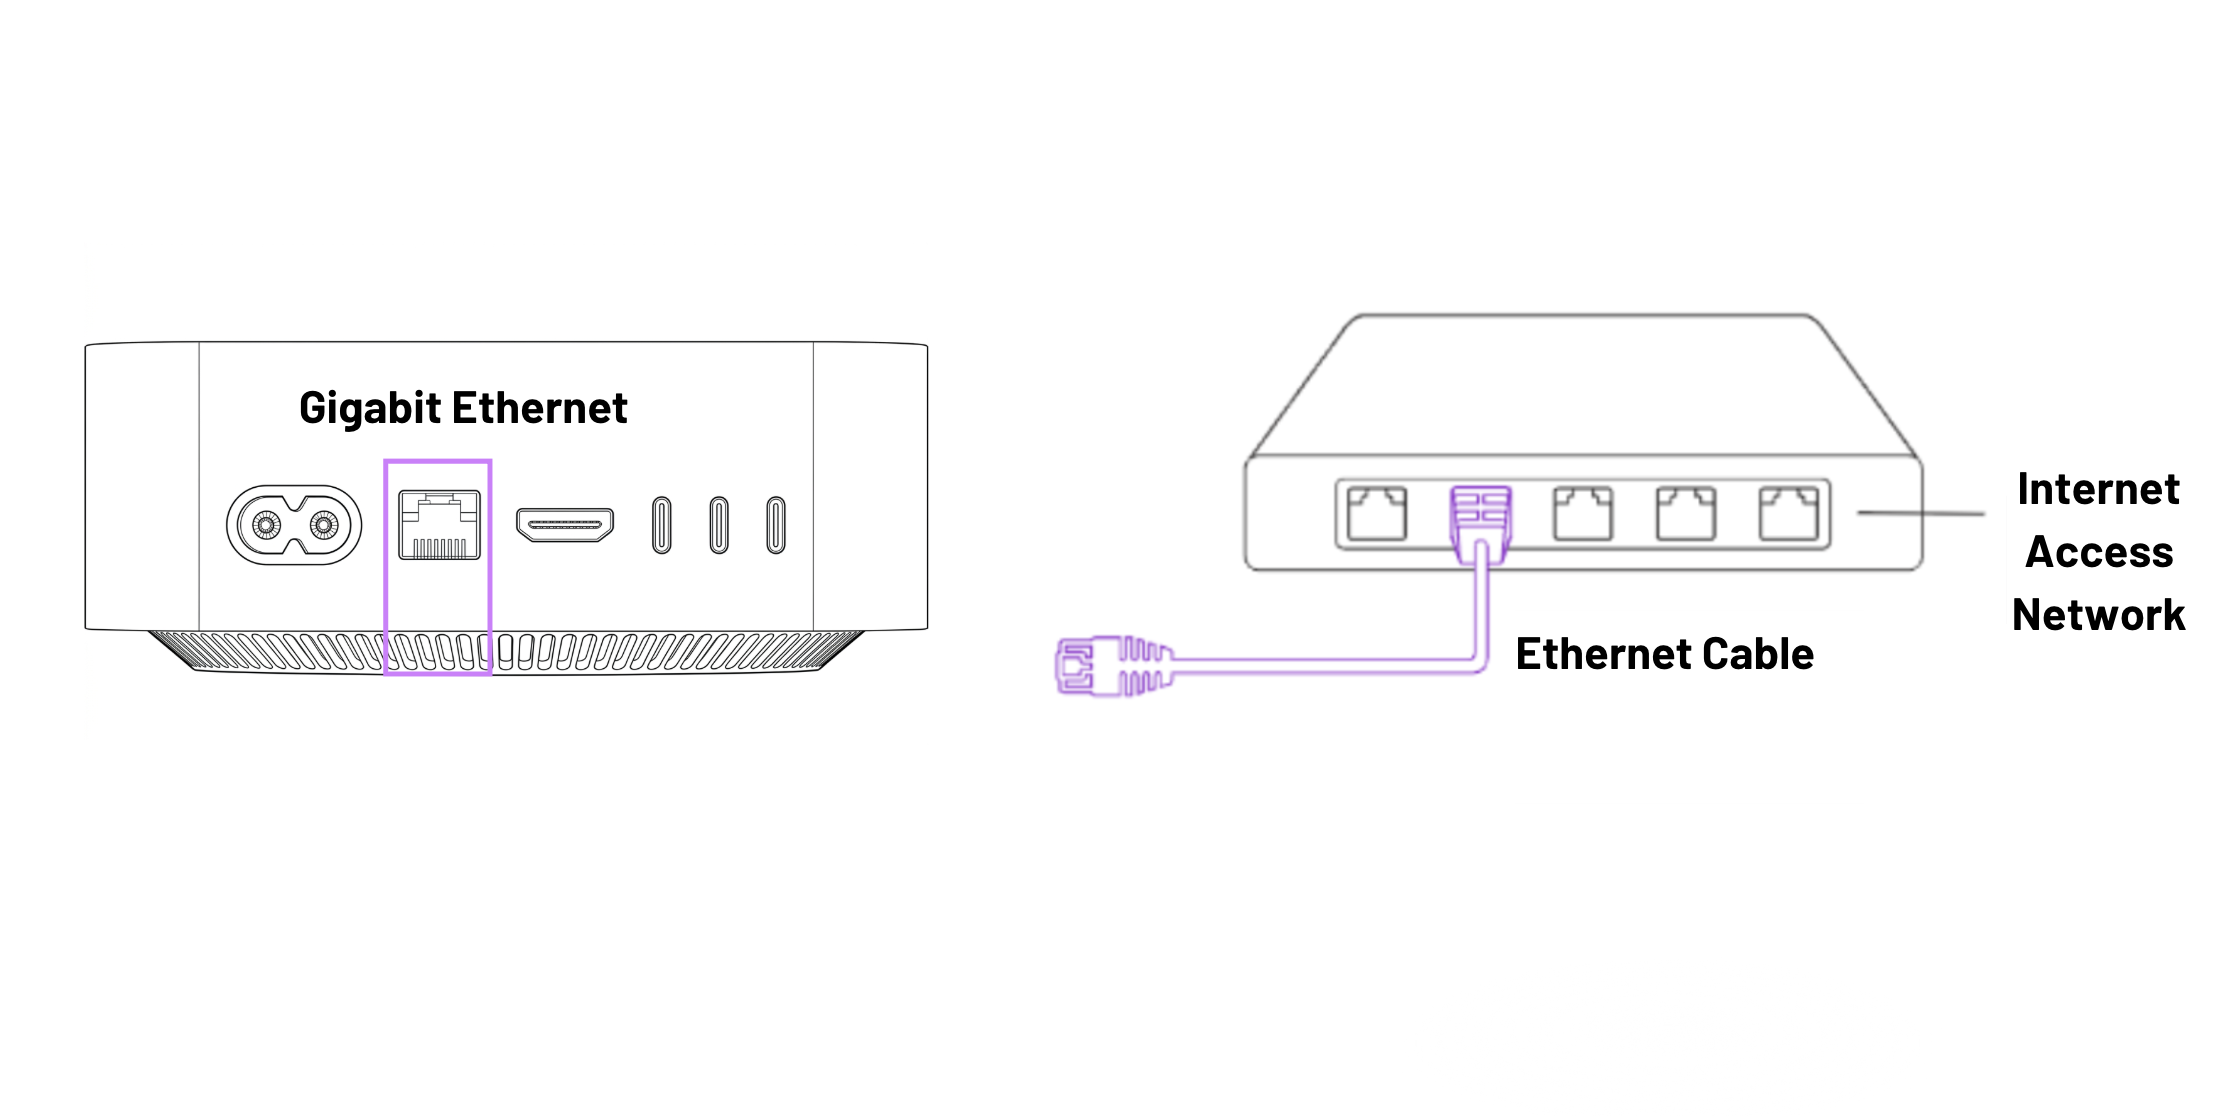
2 (a). For a single-homed configuration, connect one end of the Ethernet cable to the base station and the other to an open port on a switch in your network.
⚠️ CAUTION: Booted (jacketed) RJ-45 cables can sometimes fail to seat fully in the M4 Mac Mini’s Ethernet port because the port is slightly recessed behind the outer chassis. Even a minor difference in boot height or stiffness can prevent the latch from engaging cleanly, leading to intermittent or unreliable link detection. For consistent installs, we recommend using non-booted cables, or trimming/modifying the boot on one end without damaging the connector itself.
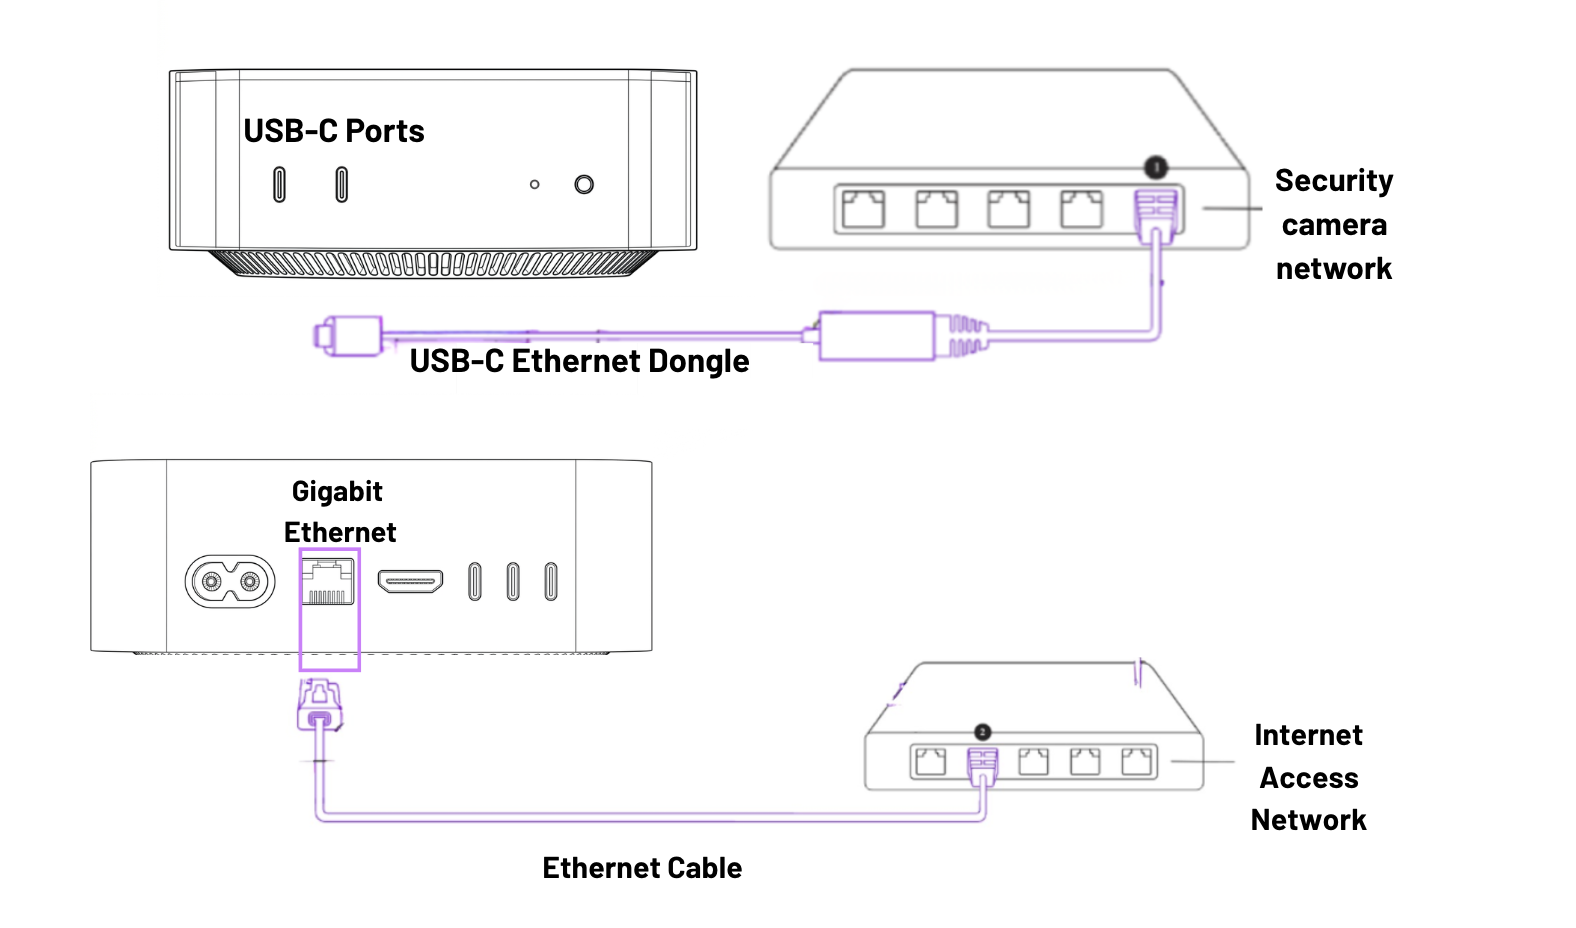
2 (b). For a dual-homed configuration (necessary if your camera network is separate from your Internet access network), plug the USB-C Ethernet dongle into an available USB-C port on the front of the base station - the same side as the white power LED.
Then, attach one end of the second Ethernet cable to the dongle and the other to your security camera network switch. Ensure the base station’s Gigabit Ethernet port on the back is connected to the corporate network for internet access.
⚠️ CAUTION (USB-C Ports): The rear USB-C/Thunderbolt ports on the M4 Mac Mini are known to show intermittent connectivity issues, where devices may disconnect, fail to initialize, or behave inconsistently.
3. Power Up The Base Station
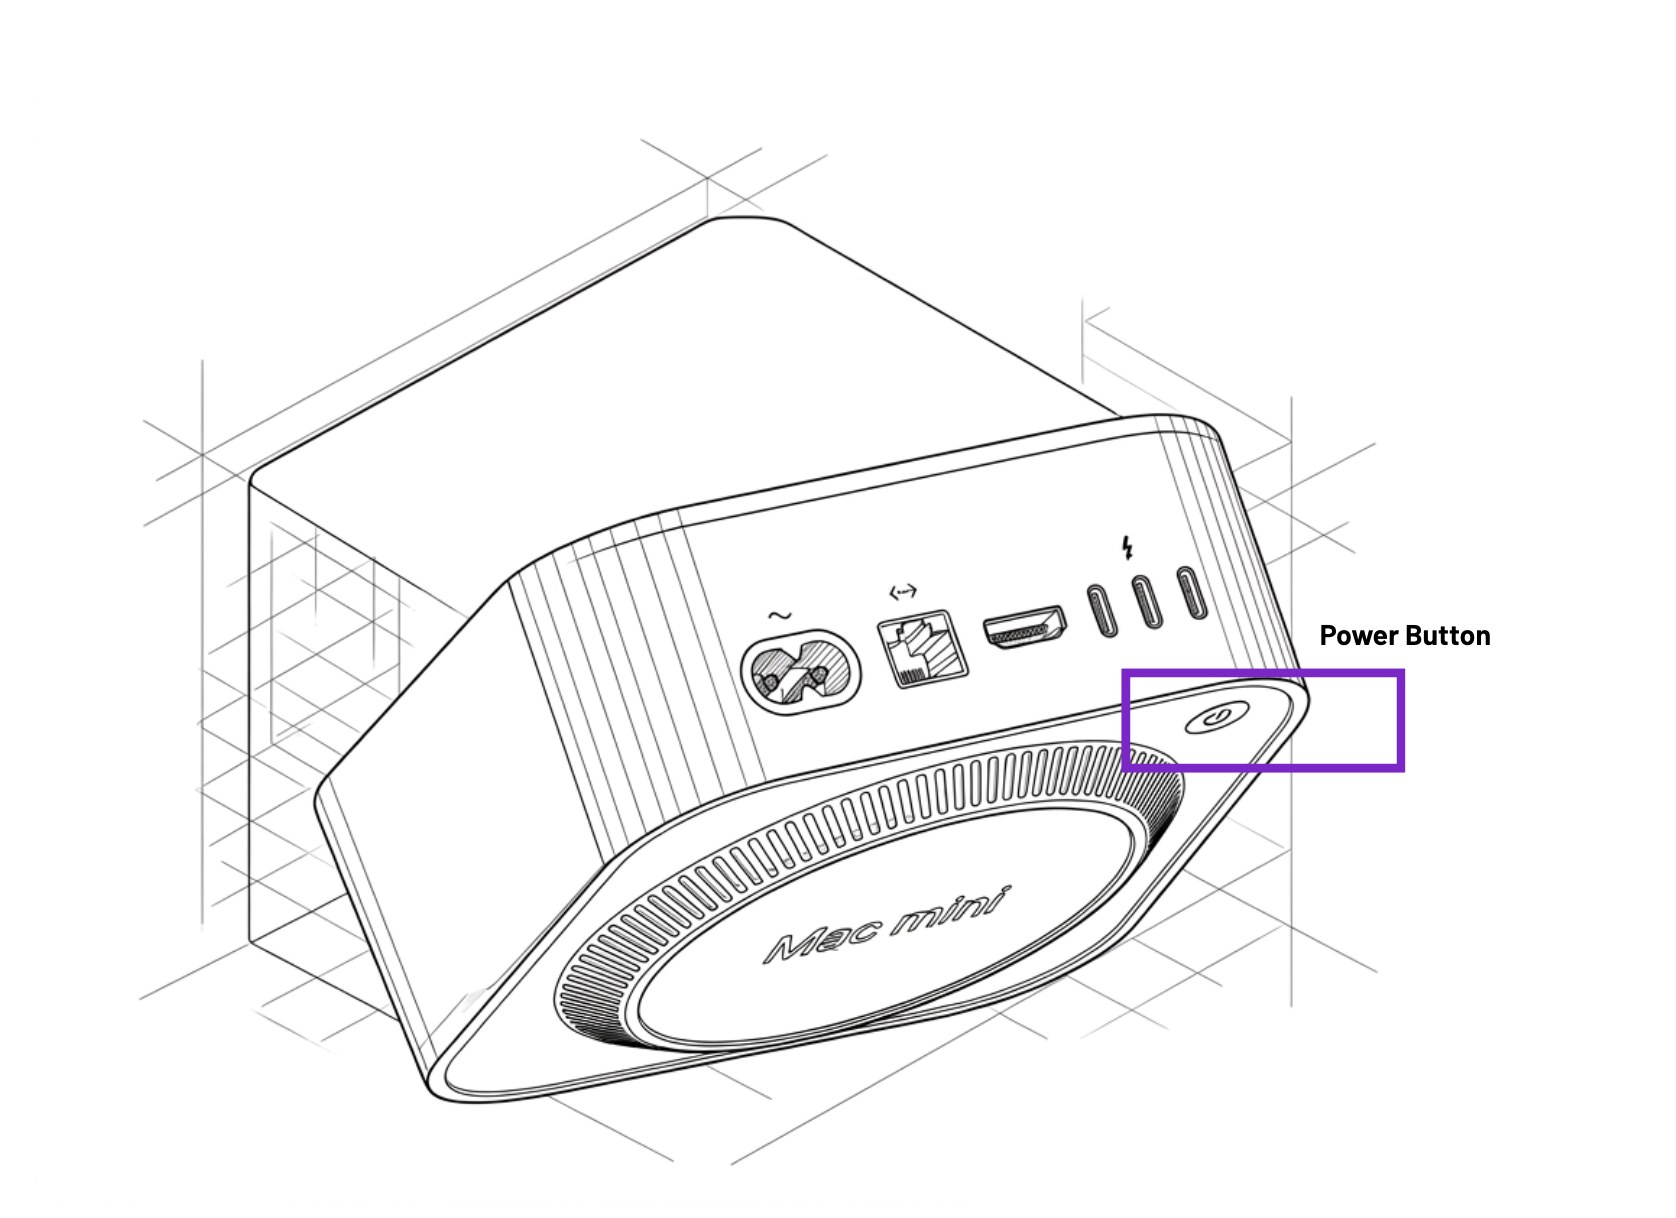
Plug one end of the power cord into an accessible power outlet and the other end into the open power plug slot on the left side of the base station, between the Ethernet port and power button.
Use the power button located on the base station to turn it on. On older Mac Mini models (M1/M2), the power button is located at the back left, while on newer M4 models, it is located on the bottom of the device.
You will notice a light on the front and hear an audible sound after 2-3 seconds, signaling that it is powered on.
4. Base Station Auto-Configuration
a) This process is entirely remote and automated. The base station will connect to the internet and download all necessary Dragonfruit software and hardening policies. This step will take 25 to 30 minutes for typical network connections, but may take up to an hour on slower networks (example, 50 Mbps connection).
b) Post-configuration, the base station will reboot automatically. The provisioning process includes multiple reboots, each accompanied by an audible sound. This is not cause for concern and indicates that the provisioning process is proceeding as expected. Once all steps are complete, the base station will finish installing all necessary scripts and software, including the Dragonfruit software.
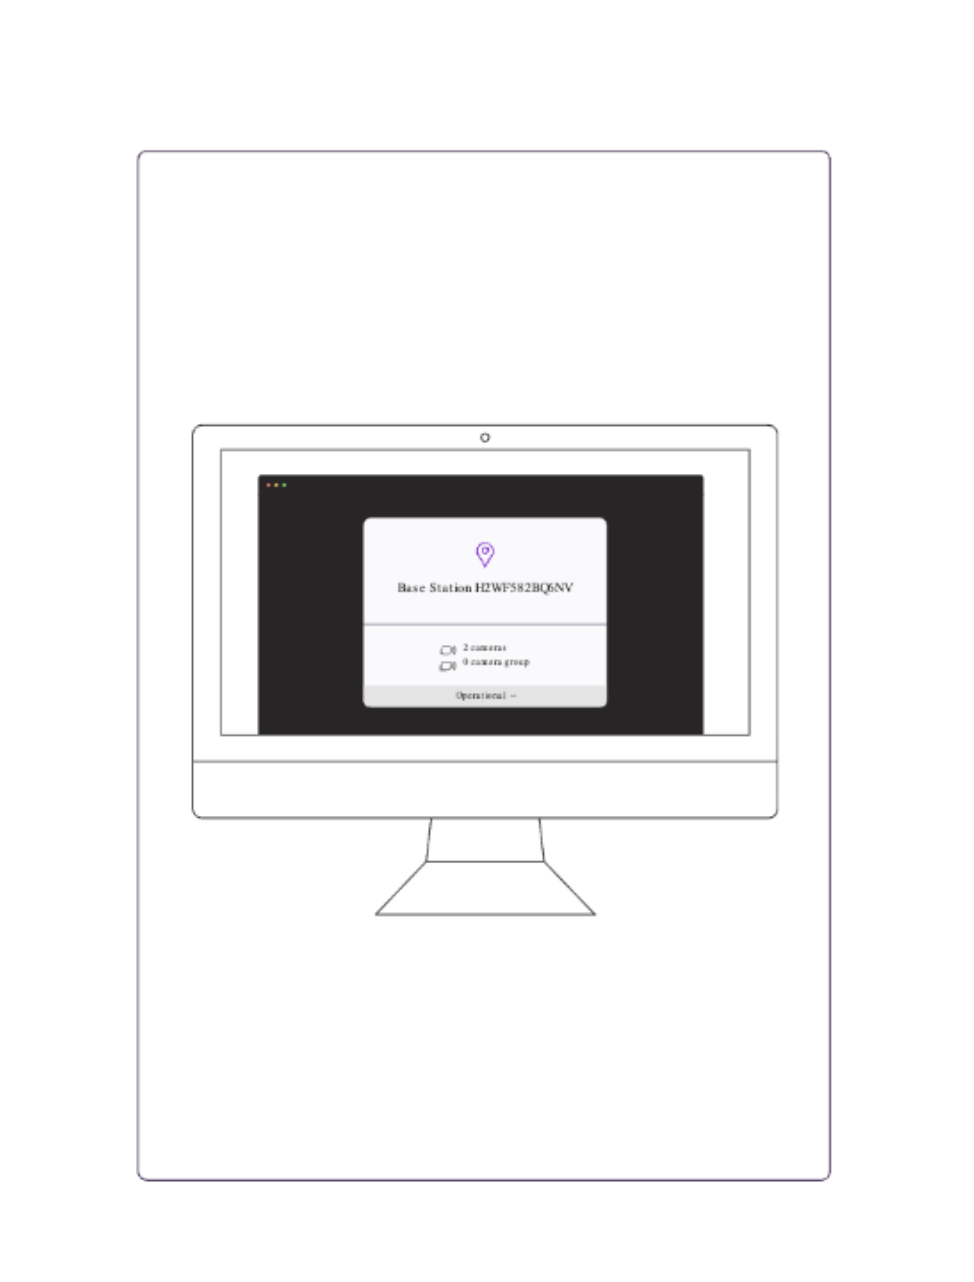
Verify Base Station Status in Control Panel After powering on the Base Station, you must validate that it has successfully connected to the Dragonfruit platform in the Dragonfruit Control Panel.
You Did It!
Congratulations on successfully installing and configuring your base station. The Dragonfruit Client Success Team will be reaching out to you shortly for the next steps.